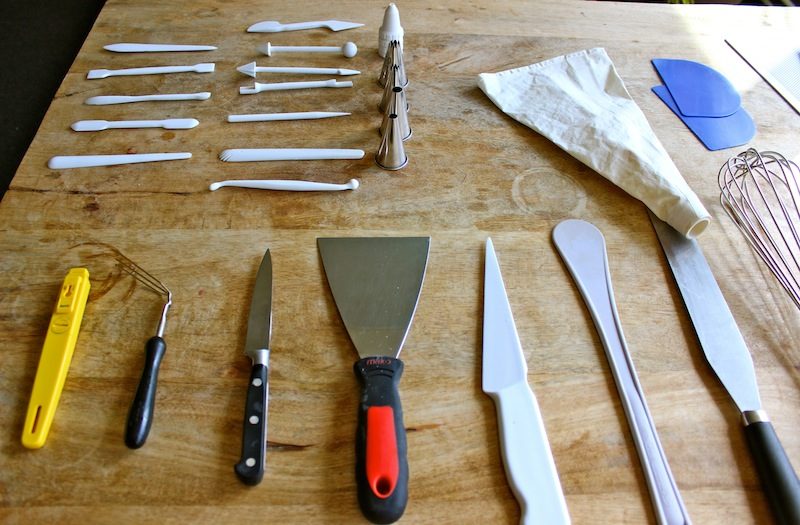
I have accumulated quite the chocolate toolbox over the last few months, so I thought it might be useful to set out what I consider to be the five most important tools for making one of Belgian chocolate’s most famous exports – pralines.
CHOCOLATE TOOLBOX
1. PALETTE KNIFE AND METAL SCRAPER

Yes, I know that a palette knife and a metal scraper are two different tools and they can be and are used separately, but I have included them here together because they are almost always used in tandem when making pralines.
These are crucial to help you temper the chocolate. Tempering is controlling the temperature. For example, to begin making a chocolate praline, pure dark chocolate needs to be at 31-32°C, milk chocolate at 29-30°C and white chocolate at 28°C. If you don’t control the temperature, then crystals of cocoa butter are produced at different sizes and your chocolate will appear matt and covered in white patches as well as crumbling rather than snapping.
I want my pralines to be shiny and beautiful so I make sure to temper the chocolate before doing anything else. To temper the chocolate you pour two thirds of your chocolate on a marble slab (this way the chocolate doesn’t seep into the surface and it cools naturally). You work the chocolate on the slab with the palette knife and the scraper making sure at all times that you keep the chocolate moving.
This is how you control the change of temperature. But how do you then measure the temperature of the chocolate?
2. DIGITAL THERMOMETER

After you’ve worked the melted chocolate on the marble for a while, you want to check the temperature with a digital thermometer. You might not believe it, but this is an exciting moment!
Three things can happen!
First, the chocolate might still be too hot. No harm done, you just keep on tempering for a bit longer.
Second, the chocolate might be too cold which means you were too enthusiastic tempering the chocolate with your tools. Don’t worry, the heatgun can come to the rescue. It’s another tool that looks a bit like a hairdryer, but don’t let it near your head! If you’re making chocolates at home you can also just reheat the chocolate as you heated in the first place.
The third outcome is of course what everybody wants. You scored a bull’s-eye and got to the exact temperature in one go!
3. MOULDS

Once you’ve got your chocolate to the right temperature, the next step is to fill the moulds.
Check out another of our posts: Four things you need to know about chocolate moulds.
There is such a big variety of moulds out there. We source our moulds from Chocolate World as we think they are high quality and they come in nearly every shape you can imagine, whether it’s the standard round or rectangular pralines to more fun ones like musical instruments, animals, flowers or even a naked woman!
First you fill the moulds to the top with your chocolate and then you tap the mould on to the table or tap it with a spoon so the air bubbles come to the surface. This way your praline won’t have any holes but will be smooth and shiny.
After shaking the mould, turn it upside down so the rest of the chocolate can run out. Holding the mould upside down, scrape off the excess and put it on a grid to dry.
After that you can fill the mould with creamy, fruity, nutty substances and to finish off you add an extra layer of chocolate and scrape off the final excess.
4. PIPING BAGS AND NOZZLES

You can try filling your moulds with a spoon, but a piping bag is a great (and simple) addition to your chocolate toolbox.
Just push a nozzle through the end of the bag and fill it with whatever sweet creation you’ve made. When using piping bags, remember not to fill the mould to the very top because you need a layer of chocolate to finish off.
Shake the mould so the mixture spreads equally over the whole mould. Then put in the fridge for the praline to harden. You can buy disposable or reusable piping bags.
5. DIPPING FORK

Using moulds to make pralines offers you a lot of variety in shape. However, there is nothing wrong with the old fashioned dipping praline. For dipping pralines and for truffles, the dipping fork is of utmost importance!
The way this works is as follows: You make your mixture of chocolate and whatever else you want to put inside your pralines or truffles (caramel, cream, fruit flavours, alcohol, etc) and you use a piping bag to squeeze round shapes on to some baking paper.
After letting them set in the freezer to harden, you attach the little round creations one by one to your dipping fork and dip them in a bowl of white, milk or dark chocolate and then back on to some baking paper. When the praline or truffle hardens, it will have a nice crunchy feel to it. For truffles, you can roll your little round creations through some cocoa powder or chocolate flakes for a nice finishing touch!
WHAT’S IN YOUR CHOCOLATE TOOLBOX?
So those are the 5 most important tools for making pralines. I have also accumulated spatulas, whisks, plastic scrapers, rulers, mixing bowls, ladles and transfer sheets. And I know that there are many more chocolate tools out there that I would love to get my hands on.
So which tools do you have in your chocolate toolbox? And which are your favourites to work with?
