This layered chocolate cake recipe came about after quite some research and several test batches when I was asked to prepare a chocolate layer cake for dessert at our annual extended family Easter dinner.
While there are many great layered chocolate cake recipes online, my inspiration largely came from the Good Housekeeping article: The best Chocolate Cake You’ll Ever Have.
Using this recipe as a base, I’ve translated the measurements from ‘cups’ to grams and after some tests with both unsweetened and sweetened cocoa (Nesquik) and different ingredient amounts and layers, I’ve come up with the following which reflects a chocolate layer cake size and flavour I believe Belgians (and non-Belgians) will love.

It’s an easy cake to make and I hope it will provide as much joy for your family and friends as it did for mine.
INGREDIENTS – WHAT YOU’LL NEED

CAKE LAYERS
→ plain flower: 140 g
→ cacao powder (sweetened): 62,5 g
→ baking powder: ¾ teaspoon
→ salt: ⅛ teaspoon
→ soft butter: 85 g
→ brown sugar: 85 g
→ granulated sugar: 112,5 g
→ 1,5 egg (2 small eggs)
→ vanilla extract: 2 teaspoons
→ buttermilk: 169 ml
FROSTING
→ cacao powder (sweetened): 21 g
→ boiling water: 37,5 ml
→ soft butter: 112,5 g
→ icing sugar: 1 tablespoon
→ dark chocolate (semi-sweet): 170 g
LAYERED CHOCOLATE CAKE RECIPE
STEP 1: PREPARE YOUR SPRING TIN FOR CAKE LAYERS
Don’t underestimate the importance of this step. You want to make sure the baked cake sections of your layered chocolate cake come out easily and don’t break.
Grease the bottom and sides of the tin with some butter and then cover the bottom with grease paper and the sides with flour.
Hold the tin in front of you and gently turn it while tapping on the sides with the palm of your hand until everything is covered. Doing this ensures you won’t have any problems getting the layers out later.


STEP 2: PREPARE YOUR MIX FOR CAKE LAYERS
Preparing the mix takes some work so we’ll divide this step into two smaller steps:

STEP 2.1. THE FLUFFY MIX
First take your brown and granulated sugar, butter, vanilla and eggs.
Soften the butter and add the two sugars. With a mixer, beat the butter and sugars on a low speed until blended, using a rubber spatula to occasionally scrape the edges of the bowl. You can increase the speed to high until you get a pale substance. Reduce the speed and add the eggs one at a time. Beat in the vanilla. You want a pale, fluffy mix.


STEP 2.2. THE FLOUR MIX
Take your salt, baking powder, cacao and flour. Blend all of these ingredients in a bowl and add this flour mixture to the fluffy mix from 2.1 above. Then mix in the buttermilk and occasionally scrape the bowl with a rubber spatula.
For step 2.2, it’s best to start and end with the flour mixture. If you can’t find buttermilk or don’t have it sitting in the fridge, you can also mix natural yoghurt (¾) and water (¼). It works perfectly!
At the end of this process, you will have a smooth brown substance.


STEP 3: BAKE YOUR LAYERS
If you use the same amounts as me, you can make two layers.
If you double the amounts, you can make three thicker layers.
If you don’t have two (or three) spring tins that are the same size, don’t worry! You can bake them separately in the same tin. Just divide the batter into two similar halves and bake one after the other.
Bake them in a preheated oven at 180°C for 22 to 25 minutes, or until you can put a toothpick into it and take it out clean.
Cool the layers in the tin for about 10 minutes before you take them out. To remove them from the tin, first use a knife to loosen the layers from the sides of the tin and then remove the sides of the spring tin so the layers are sitting on its base. Then invert the layers and (still on the grease paper) place them on wire racks so that air can get to them from the top and bottom.
Remove the grease paper and let the layers cool completely for about 45 minutes before you build the cake.
In the meantime, you can make the frosting that will go in between the layers and on top (Step 4).


STEP 4: PREPARE YOUR FROSTING
First cut dark chocolate into small pieces and melt them in a bowl sitting on a pot with hot water (au-bain-marie).
Meanwhile mix the cacao with boiling water and stir until you have a smooth paste. Beat the butter and add some icing sugar until blended.
Then add the melted and cooled chocolate and finally the cacao paste. Beat well until smooth. If the mixture is too runny, you can refrigerate it until it is stiff enough to spread.


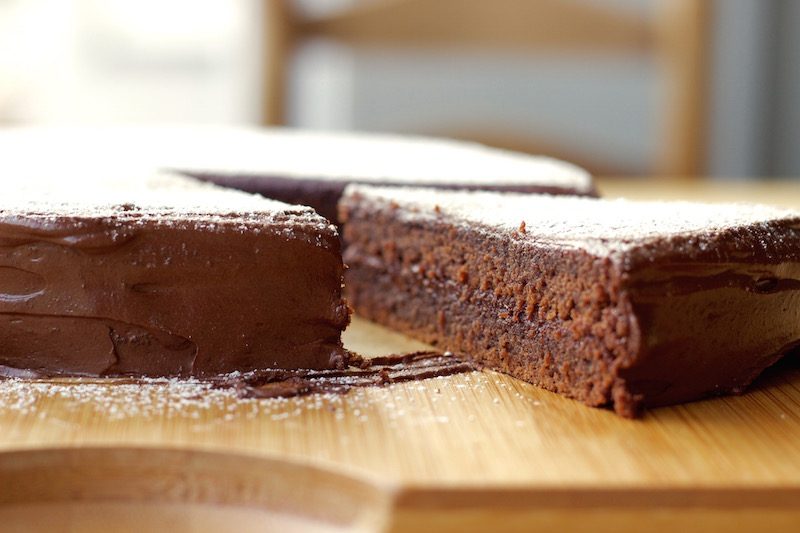
STEP 5: BUILD YOUR CHOCOLATE CAKE
Place one layer bottom side up on a cake plate. Spread two big spoonfuls of the frosting on the layer with a palette knife. Place the second layer bottom side up on top and use the remaining frosting to spread on the top and sides of the cake.
Let the frosting harden and finish with some icing sugar on top and maybe some sweets or fruit, depending on what you like.
Cut up the layered chocolate cake and enjoy!!!


