It was a dark, cold and wet November evening.
Stefanie and I were huddling up together nursing a cup of tea. “Delicious homemade chocolate brownies would go well with this”, she said. The seed of an idea was planted.
In chocolate class we had made brownies before, but I wanted to try something new, something very chocolaty, sticky and sweet. Something richer and more gooey.
I did some research. There are so many recipes out there, but one recipe really caught my eye because it combined dark, milk and white chocolate – triple homemade chocolate brownies!

It was the BBC good food easy chocolate brownie recipe. I thought I could give it a personal touch – using Belgian chocolate and changing some sugar additions from castor sugar to Belgian dark brown sugar – and I also wanted to add more photos to help you with your attempt.
So Stefanie came to my house so that we could have fun making it together.
Here are the ingredients you’ll need as part of your homemade chocolate brownies recipe:
INGREDIENTS

→ 185g butter (I used Kerrygold, but any unsalted butter would do the job)
→ 185g dark chocolate (I used Callebaut)
→ 85g plain flour
→ 40g cocoa powder (you can use the powder you make chocolate milk with)
→ 50g white chocolate (drops of Callebaut or just cut up bars)
→ 50g milk chocolate (drops of Callebaut or just cut up bars)
→ 3 large eggs
→ 275g golden caster sugar (you can mix with white sugar or even dark brown sugar)
Let’s get started. Follow these 10 steps to make your homemade chocolate brownies:
1. MELT THE BUTTER AND DARK CHOCOLATE
Start with the butter and dark chocolate. Make sure the butter isn’t too hard or too cold. You can take it out of the fridge 30 minutes before you start. Cut it up in small pieces and put them in a bowl.
Add the dark chocolate. The easiest thing is to use chocolate drops, but if you can’t get your hands on those you can just cut up bars of dark chocolate. Make sure you work with the best quality chocolate as it obviously makes a big difference in taste.
Add the pieces of chocolate to the bowl with butter and put the bowl on a pot with hot water, making sure the bottom of the bowl doesn’t sit in the water (au-bain-marie). Let the chocolate and butter melt on a low temperature and stir occasionally.


2. PREPARE THE EGG AND SUGAR MIX
While the chocolate is melting on the hob, you can prepare the rest of the brownie mix.
Sieve the flour and the cocoa powder in a small bowl. Do this by gently shaking the sieve from left to right and back again. This will get rid of any lumps and mix the flour and cocoa powder together. Then, put the bowl to the side.
Take a bigger bowl and break three large eggs. Whisk the eggs briefly until they form a smooth yellow substance, then add the caster sugar (or a mix of caster, white and dark brown sugar) and whisk until you have a thick light yellow substance which looks a bit like a thick milkshake. When you lift the whisk and the mixture leaves a trail on the surface for a few seconds, you know the whisk has done the job. It is best to use an electric whisk because it is easier to get the thickness that you need for these gooey homemade chocolate brownies.


3. COOL THE BUTTER AND DARK CHOCOLATE
When the chocolate and butter are nearly melted, you can take the warm bowl from the hob and stir until you get rid of the last bits of chocolate. By doing this the chocolate mix will cool more quickly and you don’t have any lumps.

4. SET OUT THE MILK AND WHITE CHOCOLATE
If you don’t have milk and white drops of chocolate, you can cut up some bars of both in small pieces. Put these aside, they will go in at the very end.


5. PREPARE THE BROWNIE TIN
Preheat the oven on 160° and take a square (or round) tin.
Brownies are usually made in a square tin, but if you don’t have that, a round tin will do.
Cover the bottom of the tin with some baking paper. If you have a good tin, you don’t need to worry about the sides, but if you’re not sure, brush a little butter onto the sides and sprinkle some flour on top. Turn the tin around as you do this, tapping it slightly, so that the flour spreads over the four sides of the tin.


6. FOLD IN THE CHOCOLATE TO THE EGGY MOUSSE
Then comes the most fun and arguably the most important bit. Pour the cooled chocolate mix over the eggy substance. You will see the chocolate will disappear to the bottom of the egg mousse, leaving a trail on the surface at the end. I like to have fun while doing this by making silly wee drawings as I pour.
Use a rubber spatula to gently fold the chocolate and the eggy mousse together. Do this very carefully. You don’t want to break the fluffy egg substance. Make gentle movements and take your time to do this until you get a brown coloured mix.


7. ADD THE FLOUR AND COCOA
Hold the sieve over the bowl and sieve the flour and cocoa a second time. Then very gently mix it under the chocolate and egg mixture. At first the mixture will seem very dry but keep folding in the powder until you get a thick darker brown sticky substance. Then add the bits of milk and white chocolate and fold them under the mix too.


8. GET THE TIN IN THE OVEN
The mix is now ready to go in the oven. Gently pour the mixture into the tin, using your spatula to get every little bit in there. Don’t forget to taste the mix, you will be excited to taste the baked brownie! Use the rubber spatula to evenly spread the mixture over the tin into the corners and go from side to side to have a flat surface.
Put the tin in the oven for 20-25 minutes in the middle or closer to the bottom shelf of the oven. Check after 20 minutes and if the brownie is still wobbling in the middle, put it in for an extra few minutes. The homemade chocolate brownies are ready when you see a glazy shiny surface and when the sides are coming loose from the tin.


9. TAKE IT OUT OF THE OVEN AND LET IT COOL
Let it cool completely before you take it out, otherwise it might break! When cooled you can flip the tin upside down to take it out if you’re not working with a spring tin.

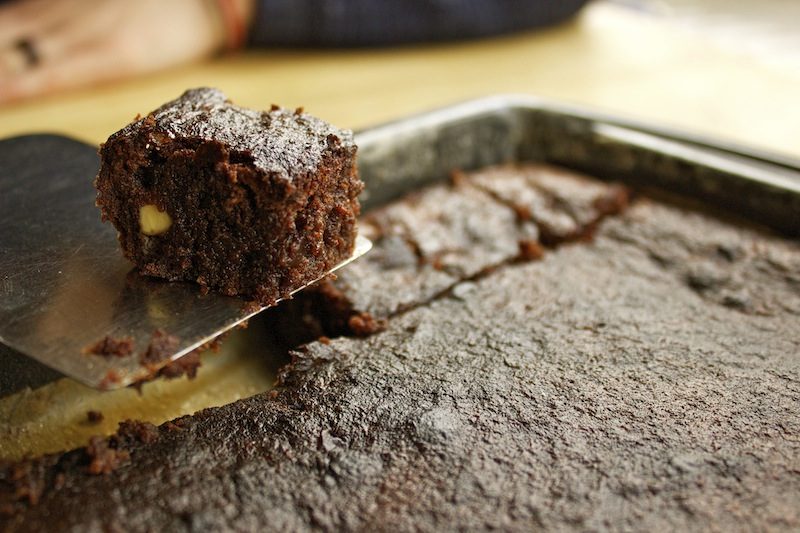
10. SERVE AND ENJOY YOUR DELICIOUS HOMEMADE CHOCOLATE BROWNIES
Cut the brownie into small squares and serve on its own or with some vanilla ice cream or raspberries.
Don’t worry, you don’t have to eat the whole thing at once. Please don’t, you will regret it! Keep some for later in an airtight container in the fridge or even in the freezer. The brownie lasts for at least a week in the fridge, up to a few weeks in the freezer.
Enjoy the stickiness and the sweetness of the homemade chocolate brownies as you climb into the sofa with your best friend and a cup of tea.

