I devised this chocolate praline recipe for the final practical exam of my fourth module in chocolate making class.
It’s a mokka buttercream chocolate praline recipe which offers the perfect combination of flavours to accompany tea or coffee when you have people round.
I shared these pralines with my family on Father’s Day and they didn’t last too long.
WHAT YOU’LL NEED:
→ Dipping fork
→ Thermometer
→ Small paper piping bags
→ Big plastic piping bag
INGREDIENTS
→ Butter: 175 g
→ Fondant sugar: 75 g
→ White chocolate: 325 g
→ Mokka (or vanilla) extract: own taste
→ White chocolate for bottom pralines (150 g) and finish (100 g)
→ Dark chocolate to dip and cover (400 g, leftover chocolate can be used again later)

MOKKA BUTTERCREAM CHOCOLATE PRALINE RECIPE
STEP 1. MAKE YOUR PRALINE BASE
For this kind of dipping praline you need a base because the filling will not be solid enough on its own to dip and make a well structured praline.
You can make the base in white (like the filling) or dark (like the covering) chocolate. In this example, I have chosen white.
First you melt a bit of white chocolate (150 g) in a bowl sitting on a pot with hot water on the hob (au-bain-marie).
Let it cool to about 30°C and fill several small paper piping bags. Chocolate hardens rather quickly, so you have to work fast.
Put some baking paper on a tray and make small round circular bases of the same size. Make sure they are not too big, ‘pinkie’ size should be fine.
When the tray is full you lift the tray and tap it on the table a few times. That way the bases will become bigger and flatter. If you’re not sure, try it out before you do it ‘for real’.
I like small pralines, but you can make them bigger if you prefer them that way. Use this chocolate praline recipe only as a guide. The size of the base will define the size of your praline. Try to get the same size for all of them.
Put the tray with round bottoms in the fridge to cool and harden. Meanwhile you can start preparing the filling.


STEP 2: PREPARE YOUR FILLING
First you melt the white chocolate (325 g) au-bain-marie and let it cool to 30°C.
While you’re waiting for the chocolate to cool, you soften the butter. You can do this with a fork.
Then you add the fondant sugar. This is a very sticky hard substance. You can put it in the microwave for twenty seconds and use your fingers to get it off the spoon when you add it to the butter.
Blend butter and sugar well. Add the melted and cooled chocolate to the mix and add drops of mokka extract. There is no perfect amount here. Add a few drops and taste. Add some more if you think it’s not enough. In my opinion there is no point in adding something if you don’t taste it at all, but it is up to you to decide.
When you’re happy with how it tastes, the next step is to fill the piping bag and make your pralines. If the mix is too runny, put it in the fridge for a short while until it is stiff enough for it not to run away but make sure you can still squeeze it out.


STEP 3: CRAFT YOUR PRALINES
Take the white rounds out of the fridge and cut off a little triangle from the edge of the piping bag.
Then squeeze the filling onto the praline bases, making sure you stay on the chocolate bottoms and form nice little round pralines. You don’t want tails of filling on top, so try to stop at the side and lift the piping bag. This is a technique you will need to learn. Again, try a few times on some baking paper before you make the real pralines.
When you have no filling left or when you have used up all the white bottoms, cool the pralines in the fridge. If you have any filling leftover, you can use it later for something else. It keeps in the fridge for about one week. It will harden in the fridge because it is chocolate based, but you can easily get it soft again by taking it out of the fridge and putting it in a warm room. Chocolate melts, right?
Then you melt dark chocolate ‘au-bain-marie’ and let it cool to about 31-32°C. This will be your dipping chocolate, so make sure to use a bowl that is deep enough to dip the pralines.
Dip the pralines in the dark chocolate with your dipping fork and let them slide off on a tray with baking paper. It is important to clean your dipping fork regularly, otherwise the chocolate will stick and harden and the pralines will not slide off easily. Try not to have tails on your praline from the dipping fork. It’s all about practice.
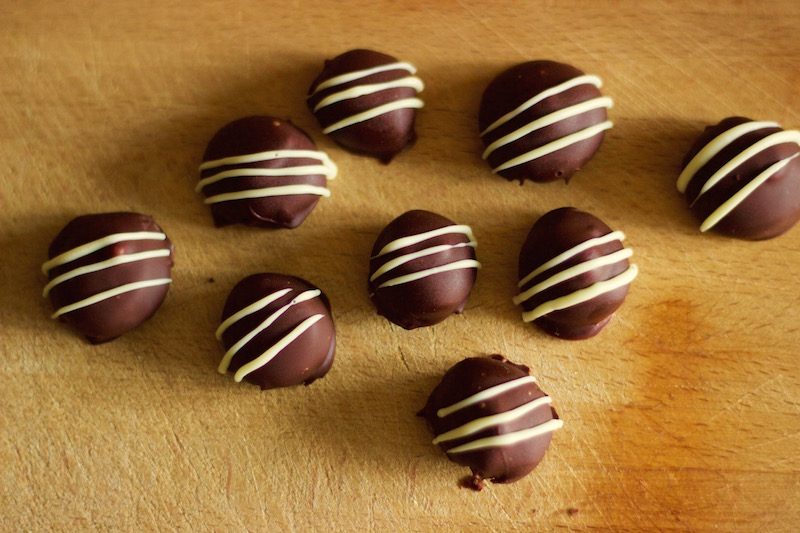
Cool the pralines in the fridge and finish them off with three thin lines of white chocolate using a small paper piping bag with melted chocolate. Refrigerate the pralines and serve them with a cup of tea or coffee.


Did you like this chocolate praline recipe? Let us know what you think and tell us about how yours turned out.
